Ulepsz klasyfikację cech za pomocą rzutowanych jąder kwantowych
Szacowany czas użycia: 80 minut na procesorze Heron r3 (UWAGA: To jest jedynie szacunek. Rzeczywisty czas wykonania może się różnić.)
Cele nauki
Po przejściu tego samouczka użytkownicy powinni rozumieć:
- Jak działają rzutowane jądra kwantowe (PQK) i kiedy oferują potencjalną przewagę kwantową.
- Jak uruchomić PQK na sprzęcie przy użyciu rzeczywistego zbioru danych.
Wymagania wstępne
Sugerujemy, aby użytkownicy zapoznali się z następującymi tematami przed przystąpieniem do tego samouczka:
- Kwantowe jądra z kursu kwantowego uczenia maszynowego w IBM Quantum® Learning
Tło
W tym samouczku pokazujemy, jak uruchomić rzutowane jądro kwantowe (PQK) za pomocą Qiskit na rzeczywistym zbiorze danych biologicznych, na podstawie artykułu Enhanced Prediction of CAR T-Cell Cytotoxicity with Quantum-Kernel Methods [1].
PQK to metoda stosowana w kwantowym uczeniu maszynowym (QML) do kodowania danych klasycznych w kwantowej przestrzeni cech i rzutowania ich z powrotem do domeny klasycznej — z wykorzystaniem komputerów kwantowych w celu usprawnienia selekcji cech. Polega na kodowaniu danych klasycznych w stany kwantowe za pomocą Circuit kwantowego, zazwyczaj poprzez proces zwany odwzorowaniem cech, gdzie dane są przekształcane w wielowymiarową przestrzeń Hilberta. Aspekt „rzutowania" odnosi się do wydobywania informacji klasycznych ze stanów kwantowych przez pomiar konkretnych obserwowalnych, w celu skonstruowania macierzy jądra, która może być używana w klasycznych algorytmach opartych na jądrach, takich jak maszyny wektorów nośnych. Podejście to wykorzystuje obliczeniowe zalety układów kwantowych, aby potencjalnie osiągnąć lepszą wydajność w pewnych zadaniach w porównaniu z metodami klasycznymi.
Głównymi elementami składowymi PQK są zredukowane macierze gęstości (RDM), uzyskiwane poprzez projekcyjne pomiary kwantowej mapy cech. W szczególności zazwyczaj oblicza się jednoQubitowe zredukowane macierze gęstości (1-RDM) dla każdego qubita. Te zmierzone wielkości są następnie używane jako dane wejściowe do klasycznej funkcji jądra, takiej jak jądro wykładnicze, w celu skonstruowania ostatecznej macierzy jądra.
PQK oferują potencjalne zalety w stosunku do standardowych jąder kwantowych, zwłaszcza w przypadku bliskich horyzontowi sprzętu kwantowego. Standardowe jądra kwantowe zazwyczaj polegają na szacowaniu globalnych przekryć stanów, co staje się coraz trudniejsze do dokładnego zmierzenia wraz ze wzrostem liczby qubitów i jest bardzo wrażliwe na szum. W przeciwieństwie do tego, PQK używają lokalnych obserwowalnych, takich jak jednoQubitowe zredukowane macierze gęstości (1-RDM), co prowadzi do mniejszego narzutu próbkowania, lepszej odporności na szum sprzętowy i lepszej skalowalności. Rzutując stany kwantowe na lokalne cechy pomiarowe przed zastosowaniem klasycznej funkcji jądra, PQK mogą zachować użyteczne korelacje kwantowe, pozostając jednocześnie bardziej praktycznymi dla urządzeń bliskich horyzontowi.
Wymagania
Przed rozpoczęciem tego samouczka upewnij się, że masz zainstalowane następujące pakiety:
- Qiskit SDK v2.0 lub nowszy, z obsługą wizualizacji
- Qiskit Runtime v0.40 lub nowszy (
pip install qiskit-ibm-runtime) - Category encoders 2.8.1 (
pip install category-encoders) - NumPy 2.3.2 (
pip install numpy) - Pandas 2.3.2 (
pip install pandas) - Scikit-learn 1.7.1 (
pip install scikit-learn) - Tqdm 4.67.1 (
pip install tqdm)
Konfiguracja
# Added by doQumentation — required packages for this notebook
!pip install -q category-encoders numpy pandas qiskit qiskit-ibm-runtime scipy scikit-learn tqdm
import warnings

# Standard libraries
import os
import numpy as np
import pandas as pd

# Machine learning and data processing
import category_encoders as ce
from scipy.linalg import inv, sqrtm
from sklearn.metrics.pairwise import rbf_kernel
from sklearn.model_selection import GridSearchCV, StratifiedKFold
from sklearn.svm import SVC

# Qiskit and Qiskit Runtime
from qiskit import QuantumCircuit
from qiskit.circuit import ParameterVector
from qiskit.circuit.library import UnitaryGate, ZZFeatureMap
from qiskit.quantum_info import SparsePauliOp, random_unitary
from qiskit.transpiler import generate_preset_pass_manager
from qiskit_ibm_runtime import (
    Batch,
    EstimatorOptions,
    EstimatorV2 as Estimator,
    QiskitRuntimeService,
)

# Progress bar
import tqdm

warnings.filterwarnings("ignore")
Przykład symulatora małej skali
W tym samouczku pomijamy przykład symulatora małej skali, ponieważ naszym głównym celem jest zademonstrowanie, jak rzutowane jądra kwantowe mogą skalować się do większych systemów i rzeczywistego sprzętu.
Przykład sprzętu dużej skali
Krok 1: Odwzoruj klasyczne dane wejściowe na problem kwantowy
Przygotowanie zbioru danych
W tym samouczku używamy rzeczywistego biologicznego zbioru danych do binarnego zadania klasyfikacji, wygenerowanego przez Daniels i in. (2022), który można pobrać z materiałów uzupełniających dołączonych do artykułu. Dane dotyczą komórek CAR T, czyli genetycznie modyfikowanych limfocytów T stosowanych w immunoterapii do leczenia niektórych nowotworów. Limfocyty T, rodzaj komórek odpornościowych, są modyfikowane w laboratorium tak, aby wyrażały chimeryczne receptory antygenowe (CAR) ukierunkowane na specyficzne białka na komórkach nowotworowych. Te zmodyfikowane komórki T mogą skuteczniej rozpoznawać i niszczyć komórki nowotworowe. Cechami danych są motywy komórek CAR T, które odnoszą się do konkretnych elementów strukturalnych lub funkcjonalnych CAR wszczepionego do limfocytów T. Na podstawie tych motywów naszym zadaniem jest przewidywanie cytotoksyczności danej komórki CAR T, oznaczając ją jako toksyczną lub nietoksyczną. Poniżej przedstawiono funkcje pomocnicze do wstępnego przetwarzania tego zbioru danych.
def preprocess_data(dir_root, args):
    """
    Preprocess the training and test data.
    """
    # Read from the csv files
    train_data = pd.read_csv(
        os.path.join(dir_root, args["file_train_data"]),
        encoding="unicode_escape",
        sep=",",
    )
    test_data = pd.read_csv(
        os.path.join(dir_root, args["file_test_data"]),
        encoding="unicode_escape",
        sep=",",
    )

    # Fix the last motif ID
    train_data[train_data == 17] = 14
    train_data.columns = [
        "Cell Number",
        "motif",
        "motif.1",
        "motif.2",
        "motif.3",
        "motif.4",
        "Nalm 6 Cytotoxicity",
    ]
    test_data[test_data == 17] = 14
    test_data.columns = [
        "Cell Number",
        "motif",
        "motif.1",
        "motif.2",
        "motif.3",
        "motif.4",
        "Nalm 6 Cytotoxicity",
    ]

    # Adjust motif at the third position
    if args["filter_for_spacer_motif_third_position"]:
        train_data = train_data[
            (train_data["motif.2"] == 14) | (train_data["motif.2"] == 0)
        ]
        test_data = test_data[
            (test_data["motif.2"] == 14) | (test_data["motif.2"] == 0)
        ]

    train_data = train_data[
        args["motifs_to_use"] + [args["label_name"], "Cell Number"]
    ]
    test_data = test_data[
        args["motifs_to_use"] + [args["label_name"], "Cell Number"]
    ]

    # Adjust motif at the last position
    if not args["allow_spacer_motif_last_position"]:
        last_motif = args["motifs_to_use"][len(args["motifs_to_use"]) - 1]
        train_data = train_data[
            (train_data[last_motif] != 14) & (train_data[last_motif] != 0)
        ]
        test_data = test_data[
            (test_data[last_motif] != 14) & (test_data[last_motif] != 0)
        ]

    # Get the labels
    train_labels = np.array(train_data[args["label_name"]])
    test_labels = np.array(test_data[args["label_name"]])

    # For the classification task use the threshold to binarize labels
    train_labels[train_labels > args["label_binarization_threshold"]] = 1
    train_labels[train_labels < 1] = args["min_label_value"]
    test_labels[test_labels > args["label_binarization_threshold"]] = 1
    test_labels[test_labels < 1] = args["min_label_value"]

    # Reduce data to just the motifs of interest
    train_data = train_data[args["motifs_to_use"]]
    test_data = test_data[args["motifs_to_use"]]

    # Get the class and motif counts
    min_class = np.min(np.unique(np.concatenate([train_data, test_data])))
    max_class = np.max(np.unique(np.concatenate([train_data, test_data])))

    num_class = max_class - min_class + 1
    num_motifs = len(args["motifs_to_use"])
    print(str(max_class) + ":" + str(min_class) + ":" + str(num_class))

    train_data = train_data - min_class
    test_data = test_data - min_class

    return (
        train_data,
        test_data,
        train_labels,
        test_labels,
        num_class,
        num_motifs,
    )

def data_encoder(args, train_data, test_data, num_class, num_motifs):
    """
    Use one-hot or binary encoding for classical data representation.
    """
    if args["encoder"] == "one-hot":
        # Transform to one-hot encoding
        train_data = np.eye(num_class)[train_data]
        test_data = np.eye(num_class)[test_data]

        train_data = train_data.reshape(
            train_data.shape[0], train_data.shape[1] * train_data.shape[2]
        )
        test_data = test_data.reshape(
            test_data.shape[0], test_data.shape[1] * test_data.shape[2]
        )

    elif args["encoder"] == "binary":
        # Transform to binary encoding
        encoder = ce.BinaryEncoder()

        base_array = np.unique(np.concatenate([train_data, test_data]))
        base = pd.DataFrame(base_array).astype("category")
        base.columns = ["motif"]
        for motif_name in args["motifs_to_use"][1:]:
            base[motif_name] = base.loc[:, "motif"]
        encoder.fit(base)

        train_data = encoder.transform(train_data.astype("category"))
        test_data = encoder.transform(test_data.astype("category"))

        train_data = np.reshape(
            train_data.values, (train_data.shape[0], num_motifs, -1)
        )
        test_data = np.reshape(
            test_data.values, (test_data.shape[0], num_motifs, -1)
        )

        train_data = train_data.reshape(
            train_data.shape[0], train_data.shape[1] * train_data.shape[2]
        )
        test_data = test_data.reshape(
            test_data.shape[0], test_data.shape[1] * test_data.shape[2]
        )

    else:
        raise ValueError("Invalid encoding type.")

    return train_data, test_data
Możesz uruchomić ten samouczek, wykonując poniższą komórkę, która automatycznie tworzy wymaganą strukturę folderów i pobiera zarówno plik treningowy, jak i testowy bezpośrednio do twojego środowiska. Jeśli masz już te pliki lokalnie, ten krok bezpiecznie je nadpisze, aby zapewnić spójność wersji.
## Download dataset

# Create data directory if it doesn't exist
!mkdir -p data_tutorial/pqk

# Download the training and test sets from the official Qiskit documentation repo
!wget -q --show-progress -O data_tutorial/pqk/train_data.csv \
  https://raw.githubusercontent.com/Qiskit/documentation/main/datasets/tutorials/pqk/train_data.csv

!wget -q --show-progress -O data_tutorial/pqk/test_data.csv \
  https://raw.githubusercontent.com/Qiskit/documentation/main/datasets/tutorials/pqk/test_data.csv

!wget -q --show-progress -O data_tutorial/pqk/projections_train.csv \
  https://raw.githubusercontent.com/Qiskit/documentation/main/datasets/tutorials/pqk/projections_train.csv

!wget -q --show-progress -O data_tutorial/pqk/projections_test.csv \
  https://raw.githubusercontent.com/Qiskit/documentation/main/datasets/tutorials/pqk/projections_test.csv

# Check the files have been downloaded
!echo "Dataset files downloaded:"
!ls -lh data_tutorial/pqk/*.csv
args = {
    "file_train_data": "train_data.csv",
    "file_test_data": "test_data.csv",
    "motifs_to_use": ["motif", "motif.1", "motif.2", "motif.3"],
    "label_name": "Nalm 6 Cytotoxicity",
    "label_binarization_threshold": 0.62,
    "filter_for_spacer_motif_third_position": False,
    "allow_spacer_motif_last_position": True,
    "min_label_value": -1,
    "encoder": "one-hot",
}
dir_root = "./"

# Preprocess data
train_data, test_data, train_labels, test_labels, num_class, num_motifs = (
    preprocess_data(dir_root=dir_root, args=args)
)

# Encode the data
train_data, test_data = data_encoder(
    args, train_data, test_data, num_class, num_motifs
)
14:0:15
Przekształcamy również zbiór danych tak, aby był reprezentowany jako dla celów skalowania.
# Change 1 to pi/2
angle = np.pi / 2

tmp = pd.DataFrame(train_data).astype("float64")
tmp[tmp == 1] = angle
train_data = tmp.values

tmp = pd.DataFrame(test_data).astype("float64")
tmp[tmp == 1] = angle
test_data = tmp.values
Weryfikujemy rozmiary i kształty zbiorów danych treningowych i testowych.
print(train_data.shape, train_labels.shape)
print(test_data.shape, test_labels.shape)
(172, 60) (172,)
(74, 60) (74,)
Krok 2: Zoptymalizuj problem pod kątem wykonania na sprzęcie kwantowym
Circuit kwantowy
Konstruujemy teraz odwzorowanie cech, które osadza nasz klasyczny zbiór danych w przestrzeni cech wyższego wymiaru. Do tego osadzenia używamy ZZFeatureMap z Qiskit.
feature_dimension = train_data.shape[1]
reps = 24
insert_barriers = True
entanglement = "pairwise"

# ZZFeatureMap with linear entanglement and a repetition of 2
embed = ZZFeatureMap(
    feature_dimension=feature_dimension,
    reps=reps,
    entanglement=entanglement,
    insert_barriers=insert_barriers,
    name="ZZFeatureMap",
)
embed.decompose().draw(output="mpl", style="iqp", fold=-1)

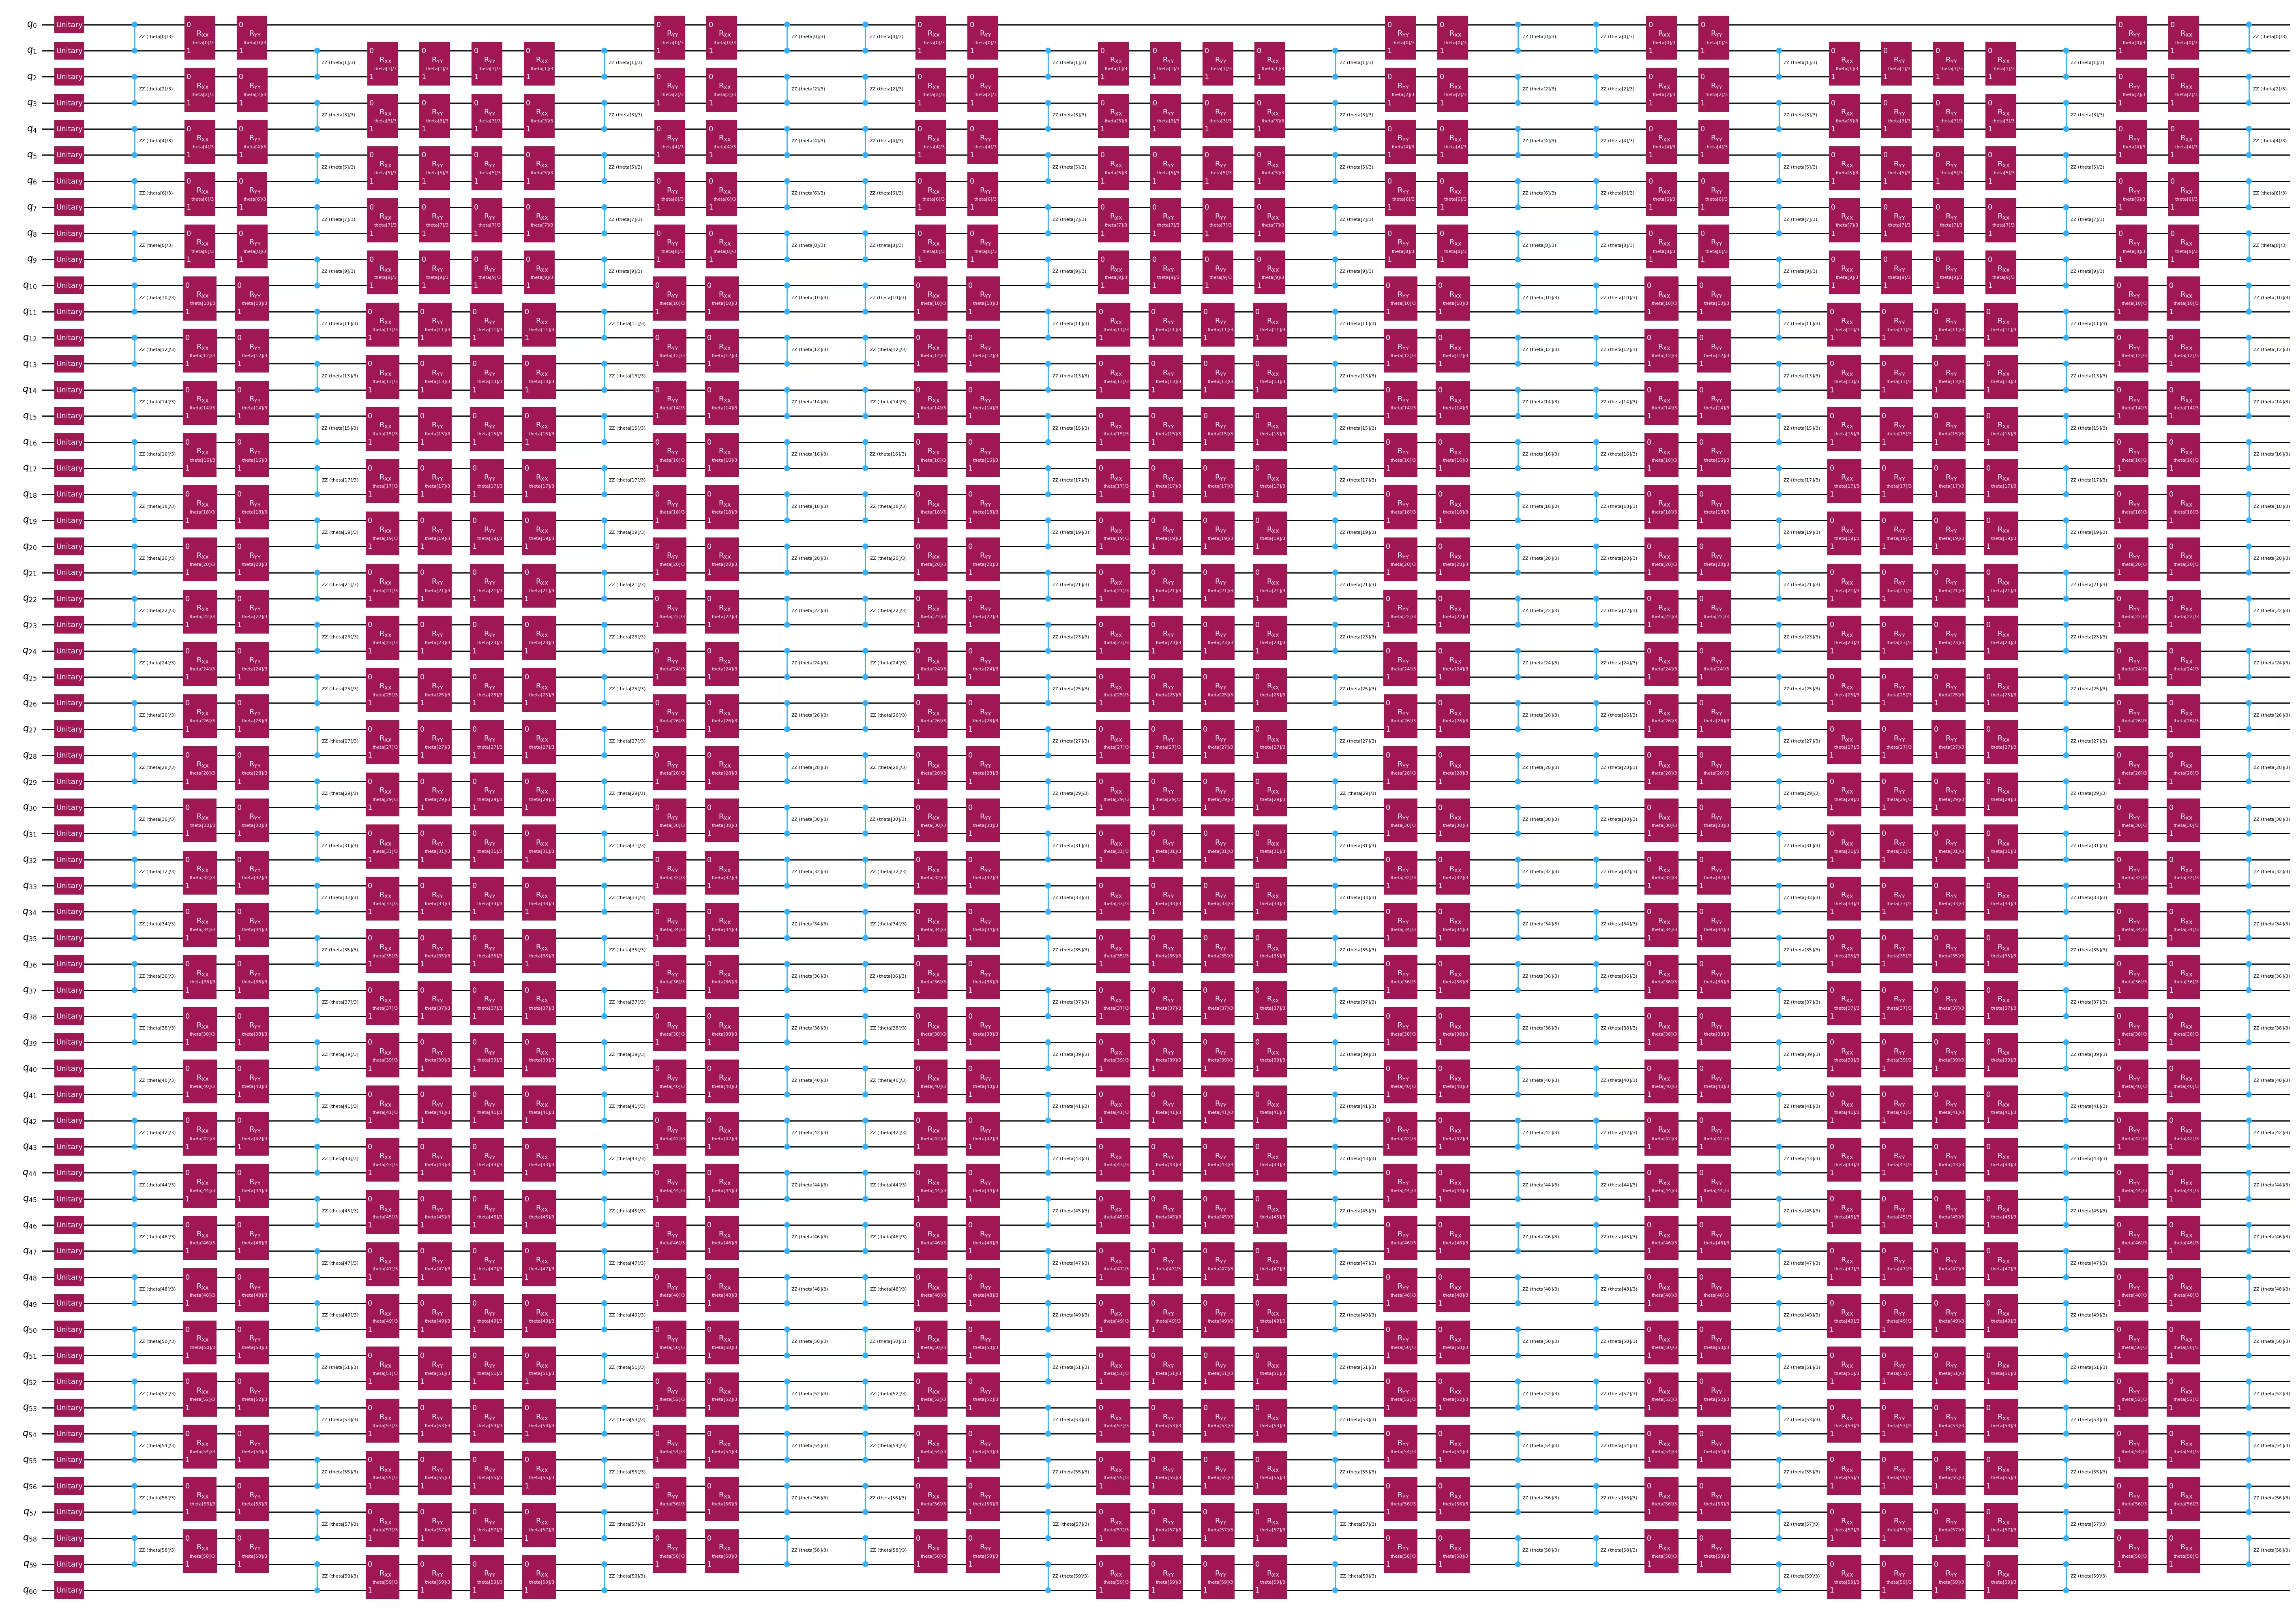
Kolejną opcją kwantowego osadzania jest ansatz ewolucji hamiltonianu Heisenberga w 1D. Możesz pominąć tę sekcję, jeśli chcesz kontynuować z ZZFeatureMap.
feature_dimension = train_data.shape[1]
num_qubits = feature_dimension + 1
embed2 = QuantumCircuit(num_qubits)
num_trotter_steps = 6
pv_length = feature_dimension * num_trotter_steps
pv = ParameterVector("theta", pv_length)

# Add Haar random single qubit unitary to each qubit as initial state
np.random.seed(42)
seeds_unitary = np.random.randint(0, 100, num_qubits)
for i in range(num_qubits):
    rand_gate = UnitaryGate(random_unitary(2, seed=seeds_unitary[i]))
    embed2.append(rand_gate, [i])

def trotter_circ(feature_dimension, num_trotter_steps):
    num_qubits = feature_dimension + 1
    circ = QuantumCircuit(num_qubits)
    # Even
    for i in range(0, feature_dimension, 2):
        circ.rzz(2 * pv[i] / num_trotter_steps, i, i + 1)
    for i in range(0, feature_dimension, 2):
        circ.rxx(2 * pv[i] / num_trotter_steps, i, i + 1)
    for i in range(0, feature_dimension, 2):
        circ.ryy(2 * pv[i] / num_trotter_steps, i, i + 1)
    # Odd
    for i in range(1, feature_dimension, 2):
        circ.rzz(2 * pv[i] / num_trotter_steps, i, i + 1)
    for i in range(1, feature_dimension, 2):
        circ.rxx(2 * pv[i] / num_trotter_steps, i, i + 1)
    for i in range(1, feature_dimension, 2):
        circ.ryy(2 * pv[i] / num_trotter_steps, i, i + 1)
    return circ

# Hamiltonian evolution ansatz
for step in range(num_trotter_steps):
    circ = trotter_circ(feature_dimension, num_trotter_steps)
    if step % 2 == 0:
        embed2 = embed2.compose(circ)
    else:
        reverse_circ = circ.reverse_ops()
        embed2 = embed2.compose(reverse_circ)

embed2.draw(output="mpl", style="iqp", fold=-1)
Krok 3: Wykonanie przy użyciu prymitywów Qiskit
Mierzenie 1-RDM
W tym kroku wyznaczamy wszystkie jednoQubitowe zredukowane macierze gęstości (1-RDM) poprzez projekcyjne pomiary kwantowej mapy cech, które następnie zostaną przekazane do klasycznej funkcji wykładniczego jądra.
Zanim wykonamy obliczenia dla całego zbioru danych, zobaczmy, jak wyznaczyć 1-RDM dla pojedynczego punktu danych. Macierze 1-RDM to zbiór jednoQubitowych pomiarów operatorów Pauliego X, Y i Z na wszystkich qubitach. Wynika to stąd, że jednoQubitowa RDM może być w pełni wyrażona jako:
Najpierw wybieramy Backend do użycia.
service = QiskitRuntimeService()
backend = service.least_busy(
    operational=True, simulator=False, min_num_qubits=133
)
target = backend.target
Następnie uruchamiamy Circuit kwantowy i mierzymy projekcje. Zwróć uwagę, że włączamy korekcję błędów, w tym Ekstrapolację Zerowego Szumu (ZNE).
# Let's select the ZZFeatureMap embedding for this example
qc = embed
num_qubits = feature_dimension

# Identity operator on all qubits
id = "I" * num_qubits

# Let's select the first training datapoint as an example
parameters = train_data[0]

# Bind parameter to the circuit and simplify it
qc_bound = qc.assign_parameters(parameters)
transpiler = generate_preset_pass_manager(
    optimization_level=3, basis_gates=["u3", "cz"]
)
transpiled_circuit = transpiler.run(qc_bound)

# Transpile for hardware
transpiler = generate_preset_pass_manager(optimization_level=3, target=target)
transpiled_circuit = transpiler.run(transpiled_circuit)

# We group all commuting observables
# These groups are the Pauli X, Y and Z operators on individual qubits
observables_x = [
    SparsePauliOp(id[:i] + "X" + id[(i + 1) :]).apply_layout(
        transpiled_circuit.layout
    )
    for i in range(num_qubits)
]
observables_y = [
    SparsePauliOp(id[:i] + "Y" + id[(i + 1) :]).apply_layout(
        transpiled_circuit.layout
    )
    for i in range(num_qubits)
]
observables_z = [
    SparsePauliOp(id[:i] + "Z" + id[(i + 1) :]).apply_layout(
        transpiled_circuit.layout
    )
    for i in range(num_qubits)
]

# We define the primitive unified blocs (PUBs) consisting of the embedding circuit,
# set of observables and the circuit parameters
pub_x = (transpiled_circuit, observables_x)
pub_y = (transpiled_circuit, observables_y)
pub_z = (transpiled_circuit, observables_z)

# Experiment options for error mitigation
num_randomizations = 300
shots_per_randomization = 100
noise_factors = [1, 3, 5]

experimental_opts = {}
experimental_opts["resilience"] = {
    "measure_mitigation": True,
    "zne_mitigation": True,
    "zne": {
        "noise_factors": noise_factors,
        "amplifier": "gate_folding",
        "extrapolated_noise_factors": [0] + noise_factors,
    },
}
experimental_opts["twirling"] = {
    "num_randomizations": num_randomizations,
    "shots_per_randomization": shots_per_randomization,
    "strategy": "active-accum",
}

# We define and run the estimator to obtain <X>, <Y> and <Z> on all qubits
estimator = Estimator(mode=backend, options=experimental_opts)

job = estimator.run([pub_x, pub_y, pub_z])
Następnie pobieramy wyniki.
job_result_x = job.result()[0].data.evs
job_result_y = job.result()[1].data.evs
job_result_z = job.result()[2].data.evs
print(job_result_x)
print(job_result_y)
print(job_result_z)
[ 3.67865951e-03  1.01158571e-02 -3.95790878e-02  6.33984326e-03
  1.86035759e-02 -2.91533268e-02 -1.06374793e-01  4.48873518e-18
  4.70201764e-02  3.53997968e-02  2.53130819e-02  3.23903401e-02
  6.06327843e-03  1.16313667e-02 -1.12387504e-02 -3.18457725e-02
 -4.16445718e-04 -1.45609602e-03 -4.21737114e-01  2.83705669e-02
  6.91332890e-03 -7.45363001e-02 -1.20139326e-02 -8.85566135e-02
 -3.22648394e-02 -3.24228074e-02  6.20431299e-04  3.04225434e-03
  5.72795792e-03  1.11288428e-02  1.50395861e-01  9.18380197e-02
  1.02553163e-01  2.98312847e-02 -3.30298912e-01 -1.13979648e-01
  4.49159340e-03  8.63861493e-02  3.05666566e-02  2.21463145e-04
  1.45946735e-02  8.54537275e-03 -8.09805979e-02 -2.92608104e-02
 -3.91243644e-02 -3.96632760e-02 -1.41187613e-01 -1.07363243e-01
  1.81089440e-02  2.70778895e-02  1.45139414e-02  2.99480458e-02
  4.99137134e-02  7.08789852e-02  4.30565759e-02  8.71287156e-02
  1.04334798e-01  7.72191962e-02  7.10059720e-02  1.04650403e-01]
[-7.31765102e-05  7.42669174e-03  9.82277344e-03  5.92638249e-02
  4.24120486e-02 -9.06473416e-03  4.55057675e-03  8.43494094e-03
  6.92097339e-02 -6.82234424e-02  6.13509008e-02  3.94200491e-02
 -1.24037979e-02  1.01976642e-01  7.90538600e-03 -7.19726160e-02
 -1.19501703e-16 -1.03796614e-02  7.37382463e-02  1.97238568e-01
 -3.59250635e-02 -2.67554009e-02  3.55010633e-02  7.68877990e-02
  6.50677589e-05 -6.59298767e-03 -1.23719487e-02 -6.41938151e-02
  1.95603072e-02 -2.48448551e-02  5.17784810e-02 -5.93767100e-02
  3.11897681e-02 -3.91959720e-18 -4.47769148e-03  1.39202197e-01
 -6.56387523e-02 -5.85665483e-02  9.52905894e-03 -8.61460731e-02
  3.91790656e-02 -1.27544375e-01  1.63712244e-01  3.36816934e-04
  2.26230028e-02 -2.45023393e-05  4.95635588e-03  1.44779564e-01
  3.71625177e-02  3.65675948e-03  2.83694017e-02 -7.10500602e-02
 -1.15467702e-01  6.21712129e-03 -4.80958959e-02  2.21021066e-02
  7.99062499e-02 -1.87164076e-02 -3.67100369e-02 -2.38923731e-02]
[ 6.85871605e-01  5.07725024e-01  8.71024642e-03  3.34823455e-02
  4.58684961e-02  9.44384189e-17 -4.46829296e-02 -2.91296778e-02
  4.15466461e-02  2.89628330e-02  1.88624017e-03  5.37110446e-02
  2.59579053e-03  1.39327071e-02 -2.90781778e-02  5.07209866e-03
  5.83403000e-02  2.60764440e-02  4.45999706e-17 -6.66701417e-03
  3.03215873e-01  2.26172533e-02  2.43105960e-02  4.98861041e-18
 -2.45530791e-02  6.26940708e-02  1.21058073e-02  2.76675948e-04
  2.63980996e-02  2.58302364e-02  7.47856723e-02  8.42728943e-02
  5.70989097e-02  6.92955086e-02 -5.68313712e-03  1.32199452e-01
  8.90511238e-02 -3.45204621e-02 -1.05445836e-01  6.03864150e-03
  2.16291384e-02  8.22303162e-03  1.00856715e-02  6.28973151e-02
  6.26727169e-02  6.15399206e-02  9.67320897e-02  1.03045269e-16
  1.79688783e-01 -1.59960520e-02 -1.15422952e-02  9.60200470e-03
  6.58396672e-02  7.78329830e-03  6.53226955e-02  2.45778685e-03
  4.36694753e-03  5.75098762e-03 -2.48896201e-02  8.33740755e-05]
Wypisujemy rozmiar Circuit i głębokość bramek dwuQubitowych.
print(f"qubits: {qc.num_qubits}")
print(
    f"2q-depth: {transpiled_circuit.depth(lambda x: x.operation.num_qubits==2)}"
)
print(
    f"2q-size: {transpiled_circuit.size(lambda x: x.operation.num_qubits==2)}"
)
print(f"Operator counts: {transpiled_circuit.count_ops()}")
transpiled_circuit.draw("mpl", fold=-1, style="clifford", idle_wires=False)
qubits: 60
2q-depth: 64
2q-size: 1888
Operator counts: OrderedDict({'rz': 6016, 'sx': 4576, 'cz': 1888, 'x': 896, 'barrier': 31})

Możemy teraz przejść w pętli przez cały zbiór treningowy, aby uzyskać wszystkie 1-RDM.
Udostępniamy również wyniki eksperymentu przeprowadzonego na sprzęcie kwantowym. Możesz albo samodzielnie uruchomić trening, ustawiając poniższą flagę na True, albo skorzystać z dostarczonych przez nas wyników projekcji.
# Set this to True if you want to run the training on hardware
run_experiment = False
# Identity operator on all qubits
id = "I" * num_qubits

# projections_train[i][j][k] will be the expectation value of the j-th
# Pauli operator (0: X, 1: Y, 2: Z) of datapoint i on qubit k
projections_train = []
jobs_train = []

# Experiment options for error mitigation
num_randomizations = 300
shots_per_randomization = 100
noise_factors = [1, 3, 5]

experimental_opts = {}
experimental_opts["resilience"] = {
    "measure_mitigation": True,
    "zne_mitigation": True,
    "zne": {
        "noise_factors": noise_factors,
        "amplifier": "gate_folding",
        "return_all_extrapolated": True,
        "return_unextrapolated": True,
        "extrapolated_noise_factors": [0] + noise_factors,
    },
}
experimental_opts["twirling"] = {
    "num_randomizations": num_randomizations,
    "shots_per_randomization": shots_per_randomization,
    "strategy": "active-accum",
}
options = EstimatorOptions(experimental=experimental_opts)

if run_experiment:
    with Batch(backend=backend):
        for i in tqdm.tqdm(
            range(len(train_data)), desc="Training data progress"
        ):
            # Get training sample
            parameters = train_data[i]

            # Bind parameter to the circuit and simplify it
            qc_bound = qc.assign_parameters(parameters)
            transpiler = generate_preset_pass_manager(
                optimization_level=3, basis_gates=["u3", "cz"]
            )
            transpiled_circuit = transpiler.run(qc_bound)

            # Transpile for hardware
            transpiler = generate_preset_pass_manager(
                optimization_level=3, target=target
            )
            transpiled_circuit = transpiler.run(transpiled_circuit)

            # We group all commuting observables
            # These groups are the Pauli X, Y and Z operators on individual qubits
            observables_x = [
                SparsePauliOp(id[:i] + "X" + id[(i + 1) :]).apply_layout(
                    transpiled_circuit.layout
                )
                for i in range(num_qubits)
            ]
            observables_y = [
                SparsePauliOp(id[:i] + "Y" + id[(i + 1) :]).apply_layout(
                    transpiled_circuit.layout
                )
                for i in range(num_qubits)
            ]
            observables_z = [
                SparsePauliOp(id[:i] + "Z" + id[(i + 1) :]).apply_layout(
                    transpiled_circuit.layout
                )
                for i in range(num_qubits)
            ]

            # We define the primitive unified blocs (PUBs) consisting
            # of the embedding circuit,
            # set of observables and the circuit parameters
            pub_x = (transpiled_circuit, observables_x)
            pub_y = (transpiled_circuit, observables_y)
            pub_z = (transpiled_circuit, observables_z)

            # We define and run the estimator to obtain <X>, <Y> and <Z>
            # on all qubits
            estimator = Estimator(options=options)

            job = estimator.run([pub_x, pub_y, pub_z])
            jobs_train.append(job)
Training data progress: 100%|██████████| 172/172 [13:03<00:00, 4.55s/it]
Gdy zadania zostaną ukończone, możemy pobrać wyniki.
if run_experiment:
    for i in tqdm.tqdm(
        range(len(train_data)), desc="Retrieving training data results"
    ):
        # Completed job
        job = jobs_train[i]

        # Job results
        job_result_x = job.result()[0].data.evs
        job_result_y = job.result()[1].data.evs
        job_result_z = job.result()[2].data.evs

        # Record <X>, <Y> and <Z> on all qubits for the current datapoint
        projections_train.append([job_result_x, job_result_y, job_result_z])
Powtarzamy to samo dla zbioru testowego.
# Identity operator on all qubits
id = "I" * num_qubits

# projections_test[i][j][k] will be the expectation value of the
# j-th Pauli operator (0: X, 1: Y, 2: Z) of datapoint i on qubit k
projections_test = []
jobs_test = []

# Experiment options for error mitigation
num_randomizations = 300
shots_per_randomization = 100
noise_factors = [1, 3, 5]

experimental_opts = {}
experimental_opts["resilience"] = {
    "measure_mitigation": True,
    "zne_mitigation": True,
    "zne": {
        "noise_factors": noise_factors,
        "amplifier": "gate_folding",
        "return_all_extrapolated": True,
        "return_unextrapolated": True,
        "extrapolated_noise_factors": [0] + noise_factors,
    },
}
experimental_opts["twirling"] = {
    "num_randomizations": num_randomizations,
    "shots_per_randomization": shots_per_randomization,
    "strategy": "active-accum",
}
options = EstimatorOptions(experimental=experimental_opts)

if run_experiment:
    with Batch(backend=backend):
        for i in tqdm.tqdm(range(len(test_data)), desc="Test data progress"):
            # Get test sample
            parameters = test_data[i]

            # Bind parameter to the circuit and simplify it
            qc_bound = qc.assign_parameters(parameters)
            transpiler = generate_preset_pass_manager(
                optimization_level=3, basis_gates=["u3", "cz"]
            )
            transpiled_circuit = transpiler.run(qc_bound)

            # Transpile for hardware
            transpiler = generate_preset_pass_manager(
                optimization_level=3, target=target
            )
            transpiled_circuit = transpiler.run(transpiled_circuit)

            # We group all commuting observables
            # These groups are the Pauli X, Y and Z operators on individual qubits
            observables_x = [
                SparsePauliOp(id[:i] + "X" + id[(i + 1) :]).apply_layout(
                    transpiled_circuit.layout
                )
                for i in range(num_qubits)
            ]
            observables_y = [
                SparsePauliOp(id[:i] + "Y" + id[(i + 1) :]).apply_layout(
                    transpiled_circuit.layout
                )
                for i in range(num_qubits)
            ]
            observables_z = [
                SparsePauliOp(id[:i] + "Z" + id[(i + 1) :]).apply_layout(
                    transpiled_circuit.layout
                )
                for i in range(num_qubits)
            ]

            # We define the primitive unified blocs (PUBs) consisting of
            # the embedding circuit,
            # set of observables and the circuit parameters
            pub_x = (transpiled_circuit, observables_x)
            pub_y = (transpiled_circuit, observables_y)
            pub_z = (transpiled_circuit, observables_z)

            # We define and run the estimator to obtain <X>, <Y> and <Z> on all qubits
            estimator = Estimator(options=options)

            job = estimator.run([pub_x, pub_y, pub_z])
            jobs_test.append(job)
Test data progress: 100%|██████████| 74/74 [00:13<00:00, 5.56it/s]
Wyniki możemy pobrać tak samo jak poprzednio.
if run_experiment:
    for i in tqdm.tqdm(
        range(len(test_data)), desc="Retrieving test data results"
    ):
        # Completed job
        job = jobs_test[i]

        # Job results
        job_result_x = job.result()[0].data.evs
        job_result_y = job.result()[1].data.evs
        job_result_z = job.result()[2].data.evs

        # Record <X>, <Y> and <Z> on all qubits for the current datapoint
        projections_test.append([job_result_x, job_result_y, job_result_z])
Krok 4: Przetwarzanie końcowe i zwracanie wyniku w żądanym formacie klasycznym
Definiowanie rzutowanego jądra kwantowego
Rzutowane jądro kwantowe jest definiowane za pomocą następującej funkcji jądra:
W powyższym równaniu jest strojonym hiperparametrem. Wartości to elementy macierzy jądra .
Korzystając z definicji 1-RDM, można zauważyć, że poszczególne składniki funkcji jądra mogą być obliczane jako , gdzie . Te wartości oczekiwane są dokładnie tym, co zmierzono powyżej.
Używając scikit-learn, można w rzeczywistości obliczyć jądro jeszcze łatwiej. Wynika to z dostępnej od razu funkcji jądra radialnego ('rbf'): . Najpierw należy jedynie przekształcić nowe rzutowane zbiory danych treningowych i testowych na dwuwymiarowe tablice.
Zwróć uwagę, że przejście przez cały zbiór danych może zajmować około 80 minut na QPU. Aby zapewnić łatwą wykonywalność pozostałej części samouczka, udostępniamy dodatkowo rzutowania z wcześniej przeprowadzonego eksperymentu (dołączone do plików pobranych w bloku kodu Download dataset). Jeśli samodzielnie przeprowadziłeś/aś trening, możesz kontynuować samouczek z własnymi wynikami.
if run_experiment:
    projections_train = np.array(projections_train).reshape(
        len(projections_train), -1
    )
    projections_test = np.array(projections_test).reshape(
        len(projections_test), -1
    )
else:
    projections_train = np.loadtxt("projections_train.txt")
    projections_test = np.loadtxt("projections_test.txt")
Maszyna wektorów nośnych (SVM)
Możemy teraz uruchomić klasyczną SVM na tym wstępnie obliczonym jądrze i użyć jądra między zbiorami testowymi a treningowymi do predykcji.
# Range of 'C' and 'gamma' values as SVC hyperparameters
C_range = [0.001, 0.005, 0.007]
C_range.extend([x * 0.01 for x in range(1, 11)])
C_range.extend([x * 0.25 for x in range(1, 60)])
C_range.extend(
    [
        20,
        50,
        100,
        200,
        500,
        700,
        1000,
        1100,
        1200,
        1300,
        1400,
        1500,
        1700,
        2000,
    ]
)

gamma_range = ["auto", "scale", 0.001, 0.005, 0.007]
gamma_range.extend([x * 0.01 for x in range(1, 11)])
gamma_range.extend([x * 0.25 for x in range(1, 60)])
gamma_range.extend([20, 50, 100])

param_grid = dict(C=C_range, gamma=gamma_range)

# Support vector classifier
svc = SVC(kernel="rbf")

# Define the cross validation
cv = StratifiedKFold(n_splits=10)

# Grid search for hyperparameter tuning (q: quantum)
grid_search_q = GridSearchCV(
    svc, param_grid, cv=cv, verbose=1, n_jobs=-1, scoring="f1_weighted"
)
grid_search_q.fit(projections_train, train_labels)

# Best model with best parameters
best_svc_q = grid_search_q.best_estimator_
print(
    f"The best parameters are {grid_search_q.best_params_} with a score of {grid_search_q.best_score_:.4f}"
)

# Test accuracy
accuracy_q = best_svc_q.score(projections_test, test_labels)
print(f"Test accuracy with best model: {accuracy_q:.4f}")
Fitting 10 folds for each of 6622 candidates, totalling 66220 fits
The best parameters are {'C': 8.5, 'gamma': 0.01} with a score of 0.6980
Test accuracy with best model: 0.8108
Klasyczny punkt odniesienia
Możemy uruchomić klasyczną SVM z funkcją jądra radialnego jako jądrem bez wykonywania rzutowania kwantowego. Ten wynik stanowi nasz klasyczny punkt odniesienia.
# Support vector classifier
svc = SVC(kernel="rbf")

# Grid search for hyperparameter tuning (c: classical)
grid_search_c = GridSearchCV(
    svc, param_grid, cv=cv, verbose=1, n_jobs=-1, scoring="f1_weighted"
)
grid_search_c.fit(train_data, train_labels)

# Best model with best parameters
best_svc_c = grid_search_c.best_estimator_
print(
    f"The best parameters are {grid_search_c.best_params_} with a score of {grid_search_c.best_score_:.4f}"
)

# Test accuracy
accuracy_c = best_svc_c.score(test_data, test_labels)
print(f"Test accuracy with best model: {accuracy_c:.4f}")
Fitting 10 folds for each of 6622 candidates, totalling 66220 fits
The best parameters are {'C': 10.75, 'gamma': 0.04} with a score of 0.7830
Test accuracy with best model: 0.7432
Dodatek: Weryfikacja potencjalnej kwantowej przewagi zbioru danych w zadaniach uczenia
Nie wszystkie zbiory danych oferują potencjalną przewagę wynikającą z zastosowania PQK. Istnieją pewne granice teoretyczne, które można wykorzystać jako wstępny test, aby sprawdzić, czy dany zbiór danych może skorzystać na zastosowaniu PQK. Aby to skwantyfikować, autorzy pracy Power of data in quantum machine learning [2] definiują wielkości zwane klasyczną i kwantową złożonością modelu oraz geometrycznym rozdzieleniem modeli klasycznych i kwantowych. Aby oczekiwać potencjalnej kwantowej przewagi z PQK, geometryczne rozdzielenie między klasycznym a kwantowo-rzutowanym jądrem powinno być w przybliżeniu rzędu , gdzie jest liczbą próbek treningowych. Jeśli ten warunek jest spełniony, przechodzimy do sprawdzenia złożoności modeli. Jeśli klasyczna złożoność modelu jest rzędu , a kwantowo-rzutowana złożoność modelu jest znacznie mniejsza niż , możemy oczekiwać potencjalnej przewagi z PQK. Geometryczne rozdzielenie jest zdefiniowane następująco (F19 w [2]):
# Gamma values used in best models above
gamma_c = grid_search_c.best_params_["gamma"]
gamma_q = grid_search_q.best_params_["gamma"]

# Regularization parameter used in the best classical model above
C_c = grid_search_c.best_params_["C"]
l_c = 1 / C_c

# Classical and quantum kernels used above
K_c = rbf_kernel(train_data, train_data, gamma=gamma_c)
K_q = rbf_kernel(projections_train, projections_train, gamma=gamma_q)

# Intermediate matrices in the equation
K_c_sqrt = sqrtm(K_c)
K_q_sqrt = sqrtm(K_q)
K_c_inv = inv(K_c + l_c * np.eye(K_c.shape[0]))
K_multiplication = (
    K_q_sqrt @ K_c_sqrt @ K_c_inv @ K_c_inv @ K_c_sqrt @ K_q_sqrt
)

# Geometric separation
norm = np.linalg.norm(K_multiplication, ord=np.inf)
g_cq = np.sqrt(norm)
print(
    f"Geometric separation between classical and quantum kernels is {g_cq:.4f}"
)

print(np.sqrt(len(train_data)))
Geometric separation between classical and quantum kernels is 1.5440
13.114877048604
Złożoność modelu jest zdefiniowana następująco (M1 w [2]):
# Model complexity of the classical kernel

# Number of training data
N = len(train_data)

# Predicted labels
pred_labels = best_svc_c.predict(train_data)
pred_matrix = np.outer(pred_labels, pred_labels)

# Intermediate terms
K_c_inv = inv(K_c + l_c * np.eye(K_c.shape[0]))

# First term
first_sum = np.sum((K_c_inv @ K_c_inv) * pred_matrix)
first_term = l_c * np.sqrt(first_sum / N)

# Second term
second_sum = np.sum((K_c_inv @ K_c @ K_c_inv) * pred_matrix)
second_term = np.sqrt(second_sum / N)

# Model complexity
s_c = first_term + second_term
print(f"Classical model complexity is {s_c:.4f}")
Classical model complexity is 1.3578
# Model complexity of the projected quantum kernel

# Number of training data
N = len(projections_train)

# Predicted labels
pred_labels = best_svc_q.predict(projections_train)
pred_matrix = np.outer(pred_labels, pred_labels)

# Regularization parameter used in the best classical model above
C_q = grid_search_q.best_params_["C"]
l_q = 1 / C_q

# Intermediate terms
K_q_inv = inv(K_q + l_q * np.eye(K_q.shape[0]))

# First term
first_sum = np.sum((K_q_inv @ K_q_inv) * pred_matrix)
first_term = l_q * np.sqrt(first_sum / N)

# Second term
second_sum = np.sum((K_q_inv @ K_q @ K_q_inv) * pred_matrix)
second_term = np.sqrt(second_sum / N)

# Model complexity
s_q = first_term + second_term
print(f"Quantum model complexity is {s_q:.4f}")
Quantum model complexity is 1.5806
Następne kroki
Jeśli to zagadnienie Cię zainteresowało, możesz sięgnąć po następujące materiały:
- Szczegółowy kurs kwantowego uczenia maszynowego z IBM Quantum Learning
- Samouczek trenowania jądra kwantowego
Odnośniki
- Utro, Filippo, et al. "Enhanced Prediction of CAR T-Cell Cytotoxicity with Quantum-Kernel Methods." arXiv preprint arXiv:2507.22710 (2025).
- Huang, Hsin-Yuan, et al. "Power of data in quantum machine learning." Nature communications 12.1 (2021): 2631.
- Daniels, Kyle G., et al. "Decoding CAR T cell phenotype using combinatorial signaling motif libraries and machine learning." Science 378.6625 (2022): 1194-1200.